 |
| Cut the shoes out of the front cover of the V&A map guide and glued onto the mail order packaging piece which I am using. |
 |
| Cutting out the flower pattern from the spare plastic and gluing onto the body of the piece I am going work on. |
 |
| The next step after gluing the pattern piece onto my working piece of plastic is to draw into the pattern with a black marker pen. . |
 |
| Gluing a piece of packing lining onto the back of my plastic kite body for strenght for the next process. . |
 |
| This is the finished fabric for the kite. The yellow backing was too bright, so I used machine embroidery and black cotton to tone down the images. |
 |
| Now the fabric is finished I decided to make a sample kite out of paper and set about drawing and cutting the diamond shape I am going to use. |
 |
| Photocopying the main body of the kite. |
 |
| and the trim of the kite. |
 |
| Glued the photocopies into the diamond shape kite and trimmed to fit. |
 |
| Now that I have finished the body of the kite need to add some string on my kite so I am using recycled yarn from a jumper I pulled back. |
 |
| I have glued the yarn onto the main body and now tinting receipts and exbihition tickets using Inktense pencils and damping them with a baby wipe for a more intense colour. |
 |
| Twisted the tinted receipts and tied them one by one onto the yarn starting with the smallest first. |
 |
| Here is the finished sample kite. Now I can tweak, change colours and style if I wish too for my
real one!
|
This is the start of my real kite.
The cutting of the shape using paper.
 |
| Marking the shape out onto the fabric using a black marker pen. |
 |
| Cutting strips for the contrast edging from the V&A bag. |
 |
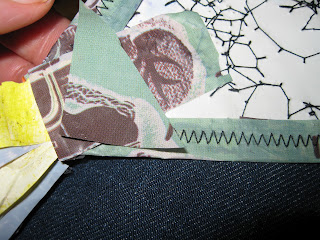
| Machine zig zag the edging onto the body of the kite using black cotton. |
 |
| Cut bamboo canes to fit the kite. |
 |
| Check that the canes fit the body of the kite. |
 |
| Glued again to strengthen the joint. |
 |
| Cut triangles out the contrast material. |
 |
| Place the triangles in the four corners where the bamboo will be and machine into place as shown in the picture below. |
 |
| Machine the little triangle into place. |
 |
| Place the ends of the bamboo canes into the little triangle pockets. |
 |
| Trimming the paper tails into narrow strips. |
 |
| The bamboo frame is now in place. |
 |
| To secure the frame I have used a glue gun in each of the corner of the kite. |
 |
| The next stage is to dye the yarn using red ink. Using a old small bowl to put some ink into it. |
 |
| Add a little water. |
 |
| Put yarn in the ink dye and leave for half an hour take out and leave to dry. |
 |
| The next stage is to cut the dyed yarn into eighteen inches long and I have glued the wool onto the top and bottom of the frame using a glue gun. |
 |
| The last stage is to attach the rest of the yarn to the yarn already attached and I have again glued them together using the glue gun. |
 |
| The finished kite. |
 |
| A closer view of the kite. |
 |
| The kite is finished but will it fly ? |
This is where my kite came from ......
all recycled materials that would have
ended up in the bin.
Unfortunatly my kite was broken in
transit so I hung it in a tree for full
effect of flying.
A bit of fun !!


